 Noor Sharaf Boutique


Dicection
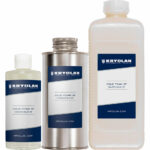
This kit contains
500 ml Part A
175 ml Part B
100 ml Release Agent
Read this instruction carefully prior to using this product.
For hazard statements and additional information please see product or check our website.
Storage and appearance:
Store airtight in a dry, dark place. Part B is particularly sensitive to air humidity.
Part A is a off-white, creamy liquid.
Part B is a syrupy, amber-colored liquid.
Release Agent is a watery, cloudy white liquid.
1. Setting the working area
Best working temperature is between 20°C and 23°C. A very high air humidity can interfere with the foaming process. Avoid
working in a humid environment. All molds and tools have to be completely dry.
In addition to the kit, you need the following tools to work with the product successfully:
1) Soft Brush to apply the release agent.
2) Paper cup or similar disposable item big enough to hold both Part A and Part B.
3) Scales with a unit of measure of 1 g or finer.
4) IPA for cleaning the molds.
5) Disposable Stirring tools, e.g. swizzle sticks or stirring staffs.
6) Clamps or a single weight, e.g. a metal block or a heavy container in a fitting size.
7) Loose powder such as Talc, Starch or Translucent Powder.
8) A small soft filbert brush.
Use Universal Color Pigments (Art. 06580/06581) as coloring agents if desired. Mix very well into Part B. Cured foam will differ in
color. Make patch tests.
2. Preparing the molds
You can use dental stone, resin or silicone-lined matrix molds for the Cold Foam SF. Make sure there are enough overflow
channels for pressure release. Without such channels closed molds may burst while the foam is expanding.
All molds have to be clean, free of grease and completely dry prior to applying the release agent.
Apply a generous amount of the release agent, using a soft brush to reach all surfaces and crevices with the liquid. Pour back
any surplus agent once you are sure all areas are covered. Use the brush to work in the drying release agent, then let dry com–
pletely. Use a hair dryer or hot air gun to speed the process.
3. Preparing the foaming process
Check again that the molds are clean, treated with release agent and completely dry. Any humidity in the molds can interfere
with the foaming process.
Cover valuable working surfaces with plastic film or paper coverings. Place the lower mold on a plane and safe working area.
Place the upper mold next to it in easy reach. Place weight or clamps next to that.
Weigh desired amount of Parts A and B into single disposable containers.
Mixing ratio: 10 parts Part A / 3,5 parts Part B by weight (NOT by volume)
Examples:
Cold Foam SF
Instructions
Part A 20 g 40 g 60 g 100 g
Part B 7 g 14 g 21 g 35 g
4. Foaming
1) Mix Parts A and B very thoroughly, but fast with a whisking movement for a maximum of 10 seconds or until foam changes
color and starts rising. Do not use an electric mixer.
2) Pour the whole mixture into the deepest part of your lower mold.
3) Take upper mold and place it in a smooth movement onto lower mold. Avoid tilting or catching.
4) Take clamps and clamp the mold tight together or place weight onto upper mold.
Curing will take about 45 to 60 minutes.
5. Removal
1) Open the mold very gently and slowly, prying it open if necessary.
2) Use any loose powder to cover the surface of the finished foam piece.
3) If finished piece sticks to the mold, use a soft small brush and powder to gently lift the piece.
4) Remove any excess foam.
Let finished pieces air for at least 24 hrs. prior application. Later store in a dry, dark place, preferably in a tight container.
Pro Tip:
You can encapsulate Cold Foam SF with Syncap. Apply a very thin layer of Syncap with a cotton bud or prepare a solution of 1
part Syncap in 7 parts Acetone and airbrush the mixture generously onto the molds. Cover all areas that might get in touch with
the Cold Foam, on both molds. Observe hazard statement and instructions.
Product Feeds
- sensitive to frost
- dangerous goods